Free Cat Amigurumi Pattern
About This Free Cat Amigurumi Pattern
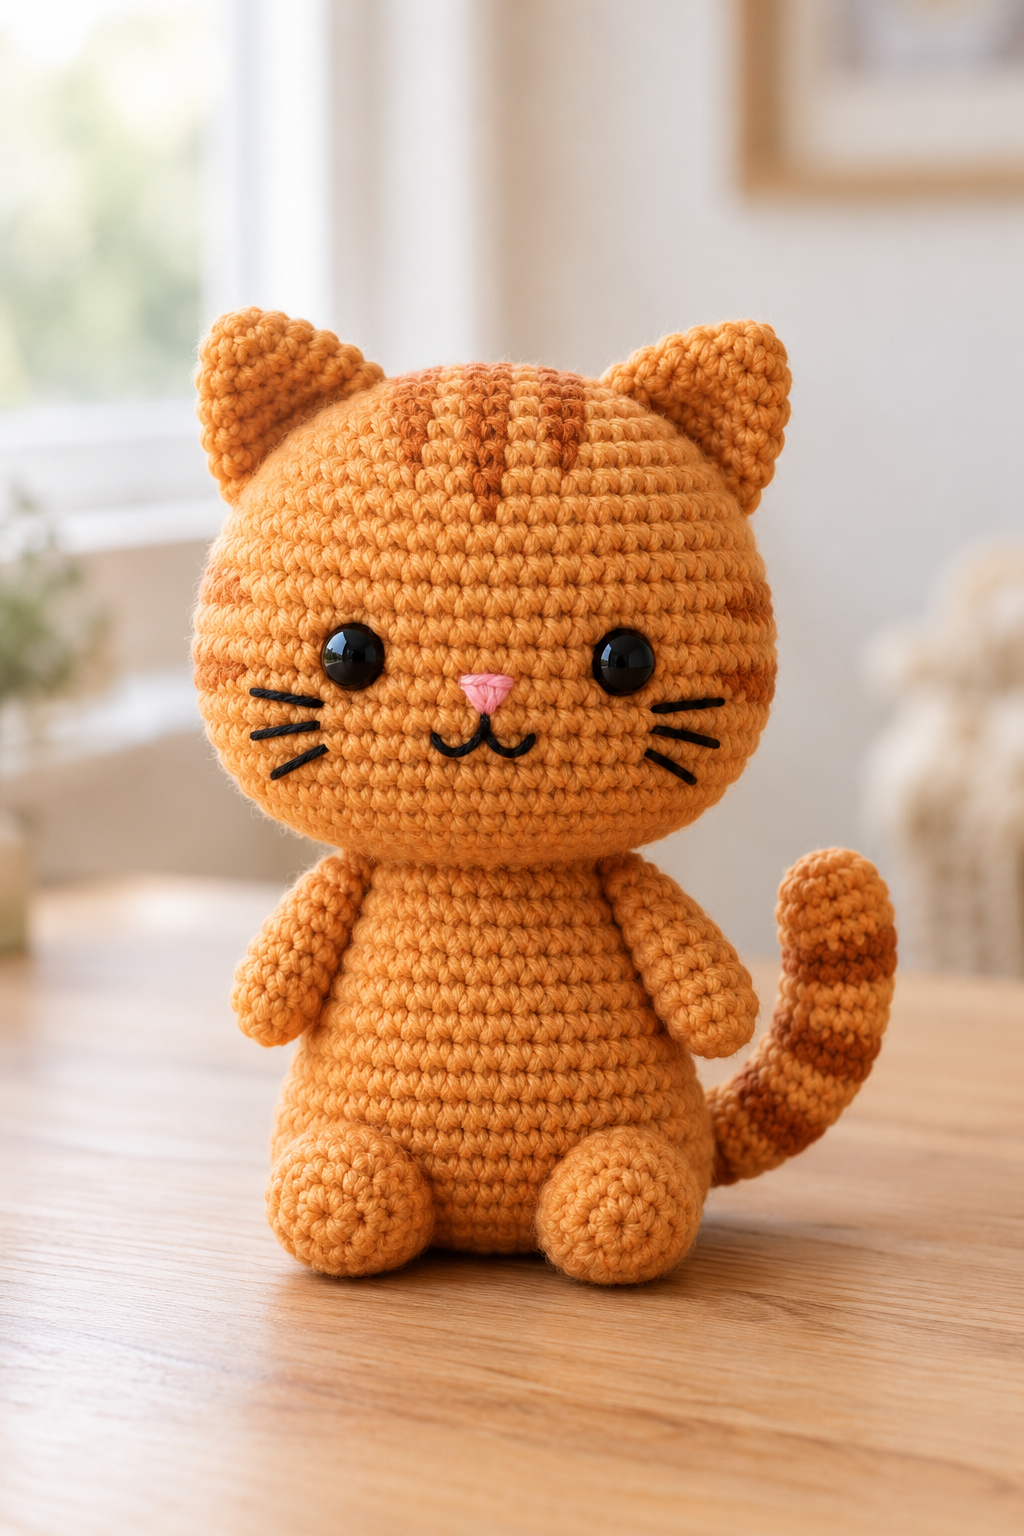
There’s something about a tiny crocheted cat that makes everyone smile. Round cheeks, little pointy ears, a curly tail… and the best part is that it’s much easier to make than it looks. This free cat amigurumi pattern uses only basic stitches, so it’s perfect whether you’re making your very first stuffed toy or your fiftieth.
In this tutorial, I’ll walk you through the materials, the abbreviations, every body part, how to put it all together, and how to give your cat a sweet little face. Grab your hook and let’s get started!
Finished size: about 6 inches (15 cm) tall when sitting, using the yarn and hook below.
Materials You’ll Need
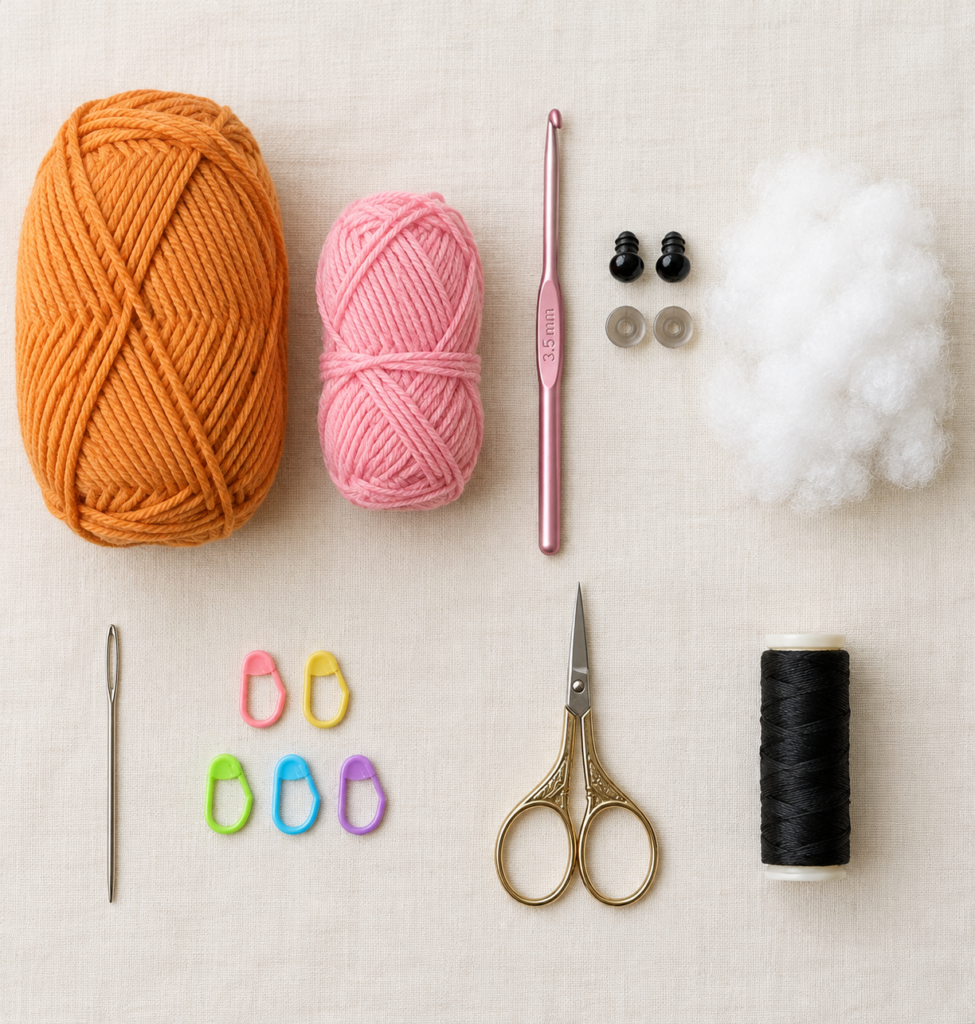
- Yarn: DK or light worsted weight cotton or acrylic. You’ll need about 60 g (130 yd / 120 m) in your main color. A small amount of pink yarn for the nose is optional.
- Crochet hook: 3.5 mm (E/4). Amigurumi should be worked tightly, so if your stitches look loose, go down a hook size.
- Safety eyes: one pair, 6 mm. (Making this for a baby or toddler? Embroider the eyes with black yarn instead.)
- Black embroidery thread or yarn for the mouth and whiskers.
- Polyester fiberfill for stuffing.
- Tapestry needle, scissors, and stitch markers. A safety pin or scrap of yarn works as a marker too.
Crochet Abbreviations and Pattern Notes
This pattern uses US crochet terms.
- MR: magic ring
- sc: single crochet
- inc: increase (2 sc in the same stitch)
- dec: decrease (single crochet 2 stitches together; the invisible decrease is recommended, see the tips below)
- sl st: slip stitch
- FO: fasten off
- ( ): the total number of stitches at the end of the round
- [ ]: repeat the instructions inside the brackets as many times as stated
Pattern notes
- Everything is worked in a continuous spiral. Don’t join rounds and don’t turn your work.
- Place a stitch marker in the first stitch of every round and move it up as you go.
- Stuff each piece firmly as you work, before the opening gets too small to fit stuffing in.
- Stitch counts appear in parentheses at the end of each round.
Free Cat Amigurumi Pattern Instructions
All pieces are worked in your main color. Make the head first, then the body, ears, legs, arms, and tail.
Head
The head is worked from the top down. You’ll stuff it and attach it to the body later.
- R1: MR, 6 sc (6)
- R2: inc in each stitch (12)
- R3: [sc, inc] x 6 (18)
- R4: [2 sc, inc] x 6 (24)
- R5: [3 sc, inc] x 6 (30)
- R6: [4 sc, inc] x 6 (36)
- R7: [5 sc, inc] x 6 (42)
- R8-15: sc in each stitch around (42) for 8 rounds
- R16: [5 sc, dec] x 6 (36)
- R17: [4 sc, dec] x 6 (30)
- R18: [3 sc, dec] x 6 (24)
Before you close up, insert the safety eyes between rounds 10 and 11, about 7 stitches apart, and secure them. Stuff the head firmly. FO, leaving a long tail (about 20 in / 50 cm) for sewing it to the body.
Body
- R1: MR, 6 sc (6)
- R2: inc in each stitch (12)
- R3: [sc, inc] x 6 (18)
- R4: [2 sc, inc] x 6 (24)
- R5: [3 sc, inc] x 6 (30)
- R6-13: sc in each stitch around (30) for 8 rounds
- R14: [3 sc, dec] x 6 (24)
- R15: sc in each stitch around (24)
Stuff the body firmly, shaping it as you go. FO, leaving a long tail.
Ears (Make 2)
- R1: MR, 6 sc (6)
- R2: [sc, inc] x 3 (9)
- R3: [2 sc, inc] x 3 (12)
- R4: sc in each stitch around (12)
FO, leaving a long tail. Don’t stuff the ears. Just flatten them so they form a little triangle.
Legs (Make 2)
- R1: MR, 6 sc (6)
- R2: inc in each stitch (12)
- R3: sc in each stitch around (12)
- R4: [sc, dec] x 4 (8)
- R5-7: sc in each stitch around (8)
Stuff lightly. FO, leaving a long tail.
Arms (Make 2)
- R1: MR, 6 sc (6)
- R2: [sc, inc] x 3 (9)
- R3-8: sc in each stitch around (9) for 6 rounds
Stuff very lightly, or not at all, so the arms stay soft and floppy. FO, leaving a long tail.
Tail
- R1: MR, 6 sc (6)
- R2-18: sc in each stitch around (6) for 17 rounds
Add a little stuffing with the blunt end of a pencil, then FO, leaving a long tail. Bend it into a gentle curve when you sew it on.
How to Assemble Your Crochet Cat
Pin everything in place before you sew. It’s much easier to fix a crooked ear now than after it’s stitched down.
- Head to body: Line up the 24-stitch opening of the head with the 24-stitch top of the body. Use the long tails to whip stitch around, adding a little more stuffing before you close the gap.
- Ears: Sew them on top of the head, around rounds 4 to 6, angled slightly outward. About 5 to 6 stitches between the ears looks cute.
- Legs: Sew them to the front of the base so your cat sits upright on its own.
- Arms: Attach them to either side of the body, just under the head.
- Tail: Sew it to the back of the base, curving it to one side.
Weave in all remaining ends.
Finishing the Free Cat Amigurumi Pattern
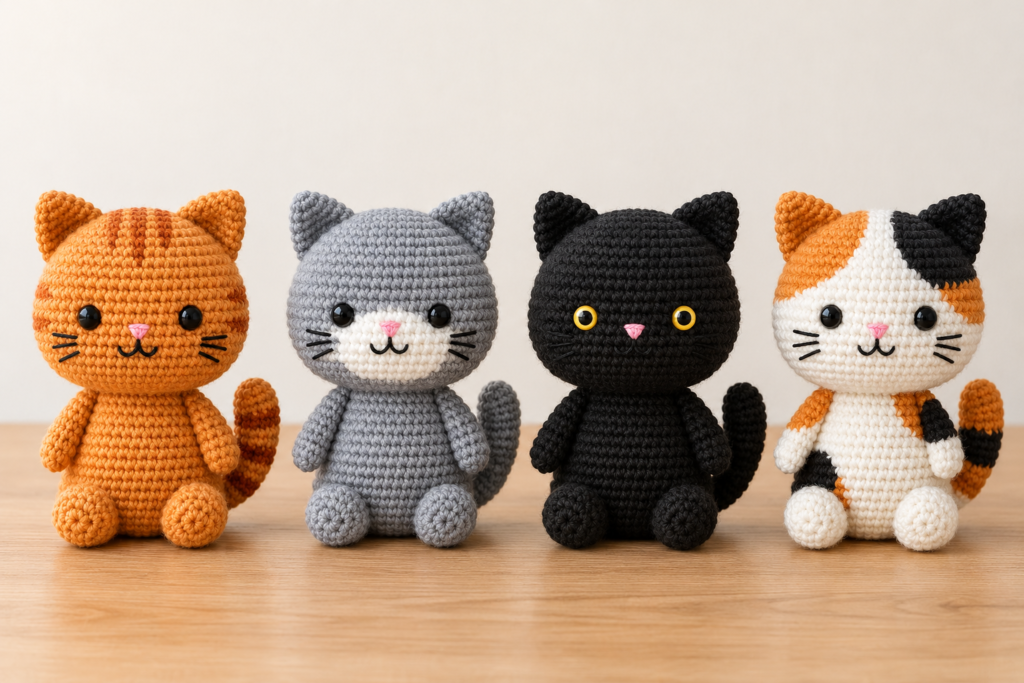
A few small habits make the difference between a homemade look and a polished one:
- Use an invisible decrease. Insert your hook into the front loops only of the next two stitches, then yarn over and pull through all loops. It leaves a much smoother surface.
- Stuff firmly, but don’t overstuff. Firm stuffing keeps the shape nice, but too much will stretch the stitches and show the filling.
- Count your stitches. It’s easy to lose track in a spiral, so check the total at the end of each round.
- Pin before you sew. Take a photo of the placement you like so you can match it.
This little cat is also a blank canvas. Try an orange tabby with stripes, a gray cat, a calico with patches, or a black cat with bright yellow eyes. Use pastel yarn for a baby-shower gift, or fuzzy yarn for a softer look. A tiny bow, a collar with a bell, or a scarf adds even more personality.
Adding the Eyes, Nose, and Mouth
If you haven’t already, secure the safety eyes between rounds 10 and 11 of the head. (For a toddler-safe cat, embroider the eyes with black yarn instead.)
Using pink yarn, embroider a small triangle for the nose, centered just below the eyes, about 2 rounds down. Then with black thread, stitch a short straight line down from the nose, finishing with a small “w” shape for the mouth.
For whiskers, pull a length of black thread through one cheek and out the other, then trim to about 1 inch on each side. Add a tiny dot of fabric glue on the knots if you want them to stay put.
Frequently Asked Questions
Is This Free Cat Amigurumi Pattern Suitable for Beginners?
Yes. It uses only a magic ring, single crochet, increases, and decreases, all worked in a spiral. If the magic ring is new to you, practice it once with scrap yarn before starting the head.
Can I Use Different Yarn for This Cat Amigurumi?
Yes. Any yarn works, but the size changes. A thicker yarn with a bigger hook gives a larger cat, and a thinner yarn gives a smaller one. Keep your stitches tight so the stuffing doesn’t show.